Are you a parent looking for creative and budget-friendly ways to dress up your adorable little one? Look no further! In this article, we will be exploring the wonderful world of DIY baby clothes. Get ready to unleash your inner sewing enthusiast as we provide you with simple and easy sewing projects that will have your baby looking stylish and unique. From cute onesies to adorable dresses, these DIY projects are perfect for those who want to add a personal touch to their baby’s wardrobe. Get your sewing machine ready, because it’s time to embark on a fun and rewarding journey of creating beautiful baby clothes!

This image is property of pixabay.com.
Baby Onesie Redesigns
Adding ruffles to a plain onesie
Are you tired of seeing your little one in plain, boring onesies? Why not add a pop of flair by adding ruffles to a plain onesie? This simple sewing project can instantly transform a plain onesie into a cute and stylish outfit for your baby. All you need is some fabric and basic sewing skills.
To create ruffles, you can start by selecting a fabric that complements the color of the onesie. Cut strips of fabric and gather them using a basting stitch. Then, pin the gathered fabric onto the onesie, making sure to evenly distribute the ruffles. Sew the fabric onto the onesie using a straight stitch, removing the basting stitches as you go. Voila! You now have a onesie with adorable ruffles that will surely catch everyone’s attention.
Creating a bow tie onesie
If you want your little one to look dapper and stylish, why not create a bow tie onesie? This easy DIY project is perfect for special occasions or simply when you want your baby to stand out. With just a few supplies and some basic sewing skills, you can create a cute bow tie onesie that will make your baby the center of attention.
To make a bow tie onesie, you will need fabric, a bow tie pattern, and a onesie. Start by cutting out the bow tie shape from the fabric using the pattern. Then, fold and stitch the edges of the bow tie to create a clean finish. Attach the bow tie to the front of the onesie using a few stitches or fabric glue. Make sure it is securely fastened, and your little one is ready to rock their stylish bow tie onesie!
Sewing on fabric patches for a personalized touch
Adding fabric patches to a plain onesie is a great way to personalize your baby’s outfit. Whether you want to add their initials, a cute animal shape, or a fun design, fabric patches can instantly add personality to any onesie. Plus, it’s a simple sewing project that even beginners can do.
To create your own fabric patches, start by selecting the fabric of your choice. You can use scraps from previous sewing projects or purchase fabric specifically for this purpose. Cut out the desired shape for your patch and sew the edges to prevent fraying. Then, stitch the fabric patch onto the onesie using a straight stitch or a decorative zigzag stitch. You can sew multiple patches onto a onesie or just add a single patch as an accent. The possibilities are endless when it comes to fabric patches!
Baby Dress Tutorials
Sewing a simple gathered dress
Is there anything cuter than a baby girl in a cute little dress? Sewing a simple gathered dress for your little one is a great way to create an adorable outfit that is both stylish and comfortable. With a few basic sewing skills and some fabric, you can whip up a dress in no time.
To sew a simple gathered dress, you will need a dress pattern or you can even create your own. Cut out the pieces of the dress from your chosen fabric, making sure to include seam allowances. Sew the front and back pieces together at the sides and shoulders, leaving openings for the armholes. Then, create a casing for the elastic at the waist, allowing the dress to gather. Insert the elastic and sew the casing closed. Finally, finish the hem of the dress and you’re done! Your baby girl now has a cute gathered dress that she can twirl around in.
Making a tutu dress with tulle
For special occasions or just to add a touch of whimsy to your baby girl’s wardrobe, a tutu dress is the perfect choice. Making a tutu dress with tulle is surprisingly easy and requires no sewing at all. All you need is some tulle, a onesie or a top, and some elastic.
To make a tutu dress, start by measuring your baby’s waist and cut a piece of elastic accordingly. Then, cut strips of tulle in your desired length and width. Tie the tulle strips around the elastic, creating a gathered effect. Continue tying the tulle strips until the entire elastic is covered. Once you’re done, you can attach the tutu to a onesie or a top, creating a beautiful and fluffy tutu dress. Your little ballerina will twirl with joy in her adorable tutu dress.
Transforming a t-shirt into a dress
If you have an old t-shirt lying around, don’t throw it away just yet. You can easily transform it into a cute and comfy dress for your baby. This DIY project requires minimal sewing and can be done in no time.
To turn a t-shirt into a dress, start by cutting off the bottom part of the shirt, just below the armpits. This will serve as the bodice of the dress. Then, cut a strip of fabric from the remaining part of the shirt to create a waistband. Sew the ends of the waistband together to form a loop. Attach the waistband to the bodice of the dress, creating a gathered effect. Finally, finish the hem of the dress and any raw edges, and you’re done! Your little one now has a unique dress made from an old t-shirt.
Reusable Cloth Diapers
Sewing a pocket cloth diaper
If you’re looking for an eco-friendly and cost-effective alternative to disposable diapers, reusable cloth diapers are a great option. Not only are they better for the environment, but they can also be customized to fit your baby’s needs. Sewing a pocket cloth diaper is a relatively simple project that requires basic sewing skills and some specialized materials.
To sew a pocket cloth diaper, you will need a waterproof fabric for the outer layer, a soft fabric for the inner layer, and absorbent inserts. Start by cutting out the pattern pieces for the diaper cover and the pocket. Sew the pieces together, leaving an opening for turning. Turn the diaper cover right side out and topstitch around the edges. Then, sew the pocket onto the inner layer, creating a space to insert the absorbent inserts. Make sure to add snaps or Velcro closures for a secure fit. With a pocket cloth diaper, you can easily adjust the absorbency by adding or removing inserts as needed.
Creating a fitted cloth diaper
Another option for reusable cloth diapers is a fitted cloth diaper. Unlike pocket diapers, fitted diapers do not have a waterproof layer and require a separate diaper cover. However, they offer a more snug and comfortable fit for your baby. Creating a fitted cloth diaper requires a bit more sewing and may be better suited for those with intermediate sewing skills.
To sew a fitted cloth diaper, you will need a soft, absorbent fabric like flannel or terry cloth. Start by cutting out the pattern pieces for the diaper and any necessary inserts. Sew the pieces together, leaving openings for turning and adding the inserts. Turn the diaper right side out and topstitch around the edges. Make sure to add snaps or Velcro closures for a secure fit. Pair the fitted diaper with a waterproof diaper cover, and your little one is ready to go!
Adding snaps for adjustable closures
To make reusable cloth diapers even more versatile, you can add snaps for adjustable closures. Snaps not only make it easier to put on and take off the diapers, but they also allow for a customizable fit. Whether your baby is in between sizes or needs a snugger or looser fit, snaps can accommodate their needs.
To add snaps to cloth diapers, you will need snap pliers or a snap press, as well as the snap components. First, mark the placement of the snaps on the diaper, making sure to account for any overlap when the diaper is closed. Using the snap pliers or press, attach the snaps according to the manufacturer’s instructions. Repeat the process for the desired number of snaps. Once the snaps are in place, you can easily adjust the diaper to fit your baby’s needs. No more worrying about diaper sizes – snaps have got you covered!
Baby Romper Patterns
Making a basic romper with snaps
Baby rompers are not only adorable but also practical. They are easy to put on and take off, making diaper changes a breeze. Making a basic romper with snaps is a fun sewing project that allows you to customize the design and create a comfortable outfit for your little one.
To make a basic romper, you will need a romper pattern or you can even create your own. Cut out the pattern pieces from your chosen fabric, making sure to include seam allowances. Sew the front and back pieces together at the sides and shoulders. Add snaps to the front or back closures for easy access. Finish the leg openings and neckline with binding or elastic for a neat finish. You can also add optional details like pockets or decorative trims. The result is a cute and functional romper that your baby will love.
Sewing a ruffle sleeve romper
If you’re looking to add a feminine touch to a baby romper, sewing a ruffle sleeve romper is a great option. With just a few extra steps, you can create a romper with adorable ruffled sleeves that will make your little one look even more charming.
To sew a ruffle sleeve romper, start by following the steps to make a basic romper. Once the main structure of the romper is complete, it’s time to add the ruffle sleeves. Cut out strips of fabric for the ruffles, making sure they are long enough to go around the armholes. Gather the fabric strips using basting stitches and attach them to the armholes of the romper. Sew the ruffles in place, removing the basting stitches as you go. The end result is a romper with cute ruffled sleeves that will surely make your baby stand out.
Adding decorative buttons for style
To add a touch of style and playfulness to baby rompers, you can easily incorporate decorative buttons. Buttons come in various shapes, sizes, and colors, allowing you to personalize the romper and add a unique touch. Plus, they can serve as functional closures or simply as decorative accents.
To add decorative buttons to a romper, start by selecting the buttons that match your desired style. Choose buttons that are safe for infants, ensuring they are securely attached. Mark the placement of the buttons on the romper, making sure they are evenly spaced. Sew the buttons in place using a strong thread or embroidery floss. If desired, you can also sew buttonholes to create functional closures. The addition of decorative buttons can instantly elevate the look of a basic romper, making it a stylish and adorable outfit for your little one.

This image is property of pixabay.com.
Adorable Baby Hats
Knitting a cozy beanie hat
When the weather starts to get chilly, keeping your baby’s head warm is essential. Knitting a cozy beanie hat is not only a practical solution but also a fun and rewarding project. With just a few knitting needles and some soft yarn, you can create a hat that will keep your little one snug and stylish.
To knit a cozy beanie hat, you will need knitting needles and chunky or worsted weight yarn. Start by casting on the desired number of stitches, based on the size of your baby’s head. Then, knit in the round using a basic knit stitch until the hat reaches the desired length. Finish the hat with a ribbed brim or bind off and sew up the seam. Add a pom-pom or decorative applique for a playful touch. Your baby will be ready to brave the cold in their cozy beanie hat!
Making a sun hat with a wide brim
When the sun is shining, it’s important to protect your baby’s delicate skin from harmful UV rays. Making a sun hat with a wide brim is a stylish and practical choice for sunny outings. This DIY project requires basic sewing skills and a few supplies that you can easily find at your local fabric store.
To make a sun hat with a wide brim, start by selecting a lightweight and breathable fabric that provides sun protection. Cut out the pattern pieces for the hat crown and the brim. Sew the crown pieces together, leaving an opening for turning. Turn the crown right side out and topstitch around the edges. Attach the brim to the crown, making sure it creates a wide and protective shade for your baby’s face. Finish the edges with binding or a bias tape for a neat finish. Your little one will look adorable while staying safe under the sun!
Sewing a lined fleece hat for colder weather
When colder weather strikes, keeping your baby’s head warm becomes even more important. Sewing a lined fleece hat is a great way to ensure your little one stays cozy and comfortable during chilly outings. This project requires basic sewing skills and some soft fleece fabric.
To sew a lined fleece hat, start by selecting a fleece fabric in a pattern or color of your choice. Cut out the pattern pieces for the hat, including the lining. Sew the crown and brim pieces together, both for the main fabric and the lining. Sew the main fabric and lining together, leaving an opening for turning. Turn the hat right side out and topstitch around the edges. Add ear flaps and a chin strap for extra warmth, and your baby will be ready to take on the cold in their lined fleece hat.
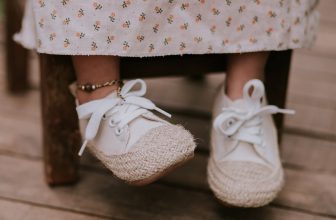
DIY Baby Shoes
Creating soft fabric booties
Making soft fabric booties for your baby is not only a fun sewing project but also a practical way to keep their little feet warm and protected. With a few supplies and some sewing skills, you can create adorable booties that your baby will love.
To create soft fabric booties, start by selecting a soft and breathable fabric like cotton or fleece. Cut out the pattern pieces for the booties, including the sole and the upper. Sew the sole pieces together, leaving an opening for turning. Turn the sole right side out and topstitch around the edges. Sew the upper pieces together, creating a snug fit. Attach the upper to the sole, making sure it is securely stitched. Add an elastic or Velcro closure for easy wearing. Your baby will appreciate the comfort and warmth of their handmade fabric booties.
Sewing baby moccasins
Baby moccasins are not only fashionable but also functional. They provide a soft and flexible sole that allows your baby’s feet to move naturally. Sewing baby moccasins is a fun and relatively simple project that allows you to create custom-made shoes for your little one.
To sew baby moccasins, start by selecting a soft and durable fabric like leather or suede for the sole and upper. Cut out the pattern pieces for the moccasins, including the sole and the upper. Sew the sole pieces together, leaving an opening for turning. Turn the sole right side out and topstitch around the edges. Sew the upper pieces together, creating a snug fit. Attach the upper to the sole, making sure it is securely stitched. Add an elastic or Velcro closure for easy wearing. Your baby will look stylish and feel comfortable in their handmade baby moccasins.
Decorating plain sneakers with fabric
If you have a pair of plain sneakers that need a pop of personality, why not decorate them with fabric? This simple DIY project allows you to customize your baby’s shoes and add a touch of style. Plus, it’s a great way to breathe new life into old or worn-out sneakers.
To decorate plain sneakers with fabric, start by selecting a fabric that complements the color of the sneakers. Cut out strips or shapes from the fabric, making sure they are large enough to cover the desired areas of the shoes. Use fabric glue or a strong adhesive to attach the fabric to the sneakers, smoothing out any wrinkles or bubbles. Allow the adhesive to dry completely before using the shoes. Your baby will rock their unique and personalized sneakers, and you’ll have a one-of-a-kind pair!

This image is property of pixabay.com.
Baby Bib Designs
Sewing a drool bib with absorbent fabric
During the teething phase, babies tend to drool a lot. That’s why having a drool bib on hand is essential to keep their clothes dry and prevent any irritation. Sewing a drool bib with absorbent fabric is a simple project that requires minimal sewing and can be completed in no time.
To sew a drool bib, start by selecting an absorbent and soft fabric, like flannel or terry cloth. Cut out the pattern pieces for the bib, including the front and back. Sew the pieces together, leaving an opening for turning. Turn the bib right side out and topstitch around the edges. Add snaps or Velcro closures for easy wearing. The absorbent fabric will help keep your baby’s clothes dry and clean, and the cute design of the drool bib will surely make a fashion statement.
Making a bandana bib with snaps
Bandana bibs are not only practical but also trendy. They provide coverage for your baby’s chest and are designed to catch any drool or food that may escape during meals. Making a bandana bib with snaps is a fun and easy sewing project that allows you to create stylish and functional bibs.
To make a bandana bib, start by selecting a soft and absorbent fabric, like cotton or flannel. Cut out the pattern pieces for the bib, including the front and back. Sew the pieces together, leaving an opening for turning. Turn the bib right side out and topstitch around the edges. Attach snaps or Velcro closures for easy wearing. The bandana bib will add a touch of style to your baby’s outfits while keeping them clean and dry.
Creating a full coverage bib with sleeves
For messy eaters or babies who really know how to make a mess, a full coverage bib with sleeves is the way to go. This type of bib provides maximum protection for your baby’s clothes and keeps food or spills from reaching their neck, arms, and chest. Creating a full coverage bib with sleeves requires some basic sewing skills and a few supplies.
To create a full coverage bib with sleeves, start by selecting a waterproof or wipeable fabric for the main body of the bib. Cut out the pattern pieces for the bib, including the front, back, and sleeves. Sew the pieces together, leaving openings for the neck and arms. Finish the edges with binding or bias tape for a neat finish. Add snaps or Velcro closures for easy wearing. With a full coverage bib, you can let your little one explore their food without worrying about the mess.
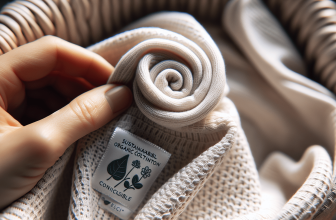
Patchwork Baby Quilts
Piecing together fabric scraps for a colorful quilt
There’s something so special about a homemade quilt, especially one made with love for your baby. Piecing together fabric scraps for a colorful patchwork quilt is not only a great way to use up leftover fabric but also a beautiful and meaningful project.
To make a patchwork quilt, start by collecting fabric scraps in various colors and patterns. Cut the scraps into squares or rectangles of equal size, making sure to include seam allowances. Lay out the fabric pieces in the desired pattern, experimenting with different combinations until you find the perfect arrangement. Sew the fabric pieces together, creating rows and then stitching the rows together to form the quilt top. Add batting and a backing fabric, quilting the layers together through stitching or tying. Finish the quilt by binding the edges, and you have a beautiful patchwork quilt that your baby will cherish for years to come.
Adding appliques and embroidery for extra charm
To make a patchwork quilt even more charming and personalized, you can add appliques and embroidery. These decorative elements can add a touch of whimsy and make the quilt truly one-of-a-kind.
To add appliques to a patchwork quilt, start by selecting fabric scraps in the desired shapes and colors. Cut out the applique shapes and position them on the quilt top. Sew the appliques onto the quilt using a straight stitch or a decorative stitch. Alternatively, you can use fusible webbing to attach the appliques without sewing.
Embroidery can also be added to a patchwork quilt to create intricate designs or personalized messages. Choose embroidery floss in colors that complement the quilt and select a stitch or design that matches your vision. Hand-stitch the embroidery onto the quilt top, being careful to secure the threads at the back. Whether it’s a cute animal, a name, or a special message, embroidery adds a special touch to a patchwork quilt.
Quilting layers of fabric, batting, and backing together
Quilting is the process of stitching together the layers of a quilt to create a cohesive and durable finished product. By quilting the layers of fabric, batting, and backing together, you ensure that the quilt will withstand regular use and washing.
To quilt a patchwork quilt, start by layering the quilt top, batting, and backing fabric. Baste the layers together using safety pins or basting stitches, making sure they lay flat and are taut. Decide on a quilting pattern, such as straight lines, diagonal lines, or free-motion quilting. Use a walking foot or a quilting foot on your sewing machine and stitch along the chosen pattern, securing the layers together. Alternatively, you can hand-quilt the layers using a needle and thread.
Quilting not only provides stability and durability to a patchwork quilt, but it also adds texture and visual interest. Whether you choose a simple quilting pattern or an intricate design, the quilting process brings the quilt to life and makes it a true work of art.
Fabric Toy Ideas
Sewing a stuffed animal with soft fabric
Creating a stuffed animal for your little one is a delightful sewing project that allows you to make a personalized and cuddly toy. With some soft fabric and basic sewing skills, you can sew a lovable companion that will bring joy to your baby.
To sew a stuffed animal, start by selecting a soft and durable fabric like fleece or minky. Choose a pattern or design that matches the animal you want to create. Cut out the pattern pieces from the fabric, making sure to include seam allowances. Sew the pieces together, leaving an opening for turning and stuffing. Turn the stuffed animal right side out and stuff it with polyester fiberfill or other stuffing material. Sew the opening closed using a ladder stitch or a slip stitch. Add any additional details, such as embroidered features or a bow, to bring the stuffed animal to life. Your little one will have a soft and huggable friend to cuddle with.
Making a crinkle toy with different textured fabrics
Babies are fascinated by the different textures and sounds they encounter. Making a crinkle toy with different textured fabrics is a sensory treat that will engage your baby’s senses and provide hours of entertainment.
To make a crinkle toy, start by selecting a variety of fabrics with different textures, such as cotton, satin, or minky. Cut out two identical shapes from each fabric, making sure they are large enough to create a substantial toy. Place the fabric shapes with right sides together and sew them together, leaving an opening for turning. Turn the toy right side out and insert a crinkle material, such as a piece of crinkly plastic or an empty chip bag. Sew the opening closed using a ladder stitch or a slip stitch. The crinkle toy will provide a sensory experience for your baby, stimulating their touch and hearing.
Creating a sensory tag blanket for tactile exploration
A sensory tag blanket is a fantastic DIY project that promotes tactile exploration and fine motor skills development. By creating a blanket with various textured ribbons and fabrics, you can provide your baby with an interactive and engaging toy.
To create a sensory tag blanket, start by selecting a soft and durable fabric for the blanket base. Cut out a square or rectangular shape, depending on your preference. Cut different lengths of ribbons or pieces of fabric and fold them in half. Place the folded ends of the ribbons or fabric pieces inside the folded edge of the blanket base, pinning them in place. Sew around the edges of the blanket, securing the ribbons or fabric pieces. Trim any excess ribbon or fabric, and your sensory tag blanket is ready for play. Your baby will have a blast exploring the different textures and colors of the ribbons, promoting their sensory development.
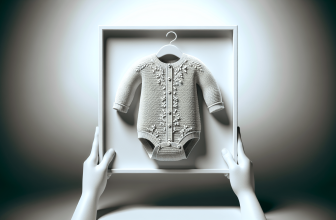
Personalized Baby Onesies
Using fabric paint or iron-on transfers for custom designs
To personalize a baby onesie and add a custom design, you can use fabric paint or iron-on transfers. These methods allow you to create unique and eye-catching designs that reflect your baby’s personality.
To use fabric paint, start by selecting fabric-safe paint colors and brushes. Place a piece of cardboard or wax paper inside the onesie to prevent the paint from bleeding through. Sketch the design or pattern directly onto the fabric using a pencil or washable fabric marker. Apply the fabric paint carefully, following the outline of your design. Let the paint dry completely before wearing or washing the onesie. Fabric paint allows you to create custom designs with intricate details or bold colors that are sure to make a statement.
Iron-on transfers are another option for adding custom designs to baby onesies. Start by selecting a design or creating your own on a computer software. Print the design onto iron-on transfer paper, making sure to mirror the image before printing. Cut out the design, leaving a small border around the edges. Position the transfer on the onesie, ensuring it is centered and aligned. Apply heat using an iron, following the instructions provided with the transfer paper. Once the transfer has adhered to the fabric, peel off the backing paper. Your personalized baby onesie is ready to be worn with pride.
Embroidering the baby’s name or initials
Embroidering the baby’s name or initials onto a onesie is a classic and timeless way to add personalization. This method allows you to create a custom design that will stand the test of time and can be passed down as a cherished keepsake.
To embroider a baby’s name or initials, start by selecting embroidery floss in a color that complements the onesie. Choose a font or stitch that matches your desired style and size. Sketch the name or initials onto the fabric using a washable fabric marker or pencil. Thread a needle with the embroidery floss and start stitching the letters, following the sketch or pattern. If desired, add additional embellishments or decorative stitches to enhance the design. Once the embroidery is complete, the onesie will bear a personal touch that is both beautiful and meaningful.
Sewing on fabric letters for a personalized message
If you want to create a baby onesie with a personalized message, sewing fabric letters is a great option. This method allows you to spell out names, phrases, or even heartfelt messages on a onesie, making it truly unique.
To sew fabric letters onto a onesie, start by selecting fabric in different colors or patterns for each letter. Draw or print out the letters onto paper and cut them out to use as templates. Place the fabric letters onto the onesie, arranging them in the desired order. Pin the letters in place and sew them onto the onesie using a straight or zigzag stitch. Make sure to secure the edges of each letter to ensure they stay in place. Your personalized message will make the onesie extra special and an absolute favorite in your baby’s wardrobe.
Whether you’re a seasoned sewer or just starting out, these DIY projects for baby clothes are a fun and creative way to add a personal touch to your little one’s wardrobe. From adorable onesie redesigns to stylish baby hats and practical cloth diapers, there’s a project for everyone. So grab your sewing supplies, let your creativity soar, and enjoy the satisfaction of making something with love for your precious bundle of joy.